- User Guides
- Getting Started
- Organization Chart
- Job Descriptions
- Four Key Functions
- Four Key Functions
- Sub Functions
- Adding Processes to the Four Functions
- Deleting Processes
- Moving Processes from One Key Function to Another
- Moving / Recording Processes within a Key Function
- Printing Process Lists
- Process Color Identification
- Mark a Process as Complete
- Adding From a Process Library
- Process Documentation Tools
- Documenting Work Processes
- Edit Title and Objective of Process
- Creating New Process Tools
- Editing Existing Process Tools
- Delete a Process Tool
- The Deleted Folder
- Archiving a Process Tool and The Archive Folder
- Printing Process Tools
- Saving Process Tools
- Reordering Process Tools
- Inserting a Hyperlink
- Building Work Plans
- Deleting Tasks and Expectations
- Editing Existing Tasks and Expectations
- Check Lists
- Scripts
- Upload Files
- Documents
- Custom Forms
- Policy Notes
- Video
- Audio
- Using AI to Build Process Tools
- My Processes
- My Employees
- Process Assignment
- Reports
- Account Administration
- User Settings
- Training Webinars
- How to Videos
- Contact Support
-
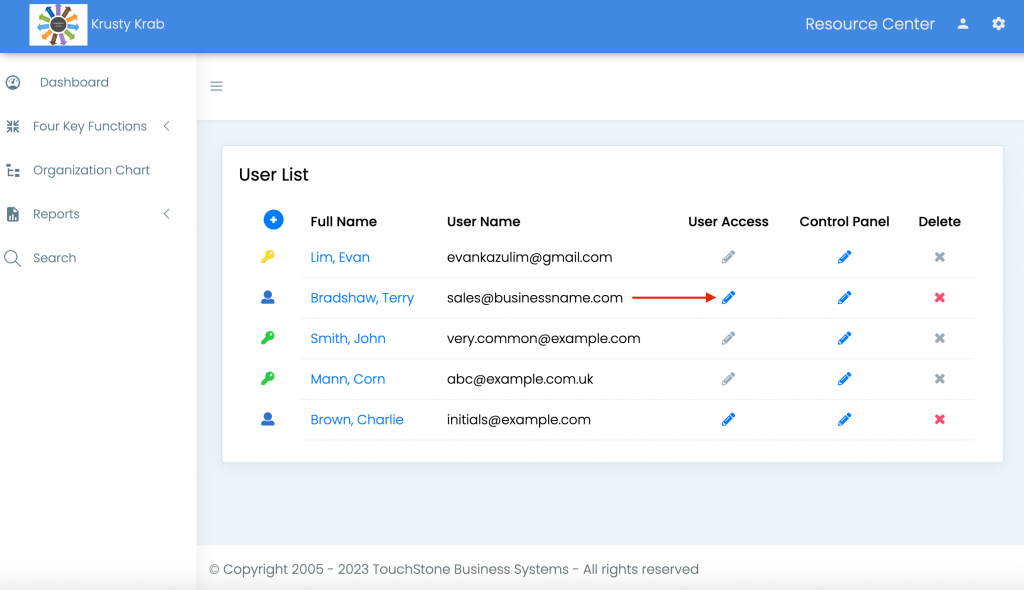
To create access for a user, select the pencil icon next to the user that you would like to give access to.
Note: Admin accounts have access to everything in Touchstone, so their access cannot be changed.
-
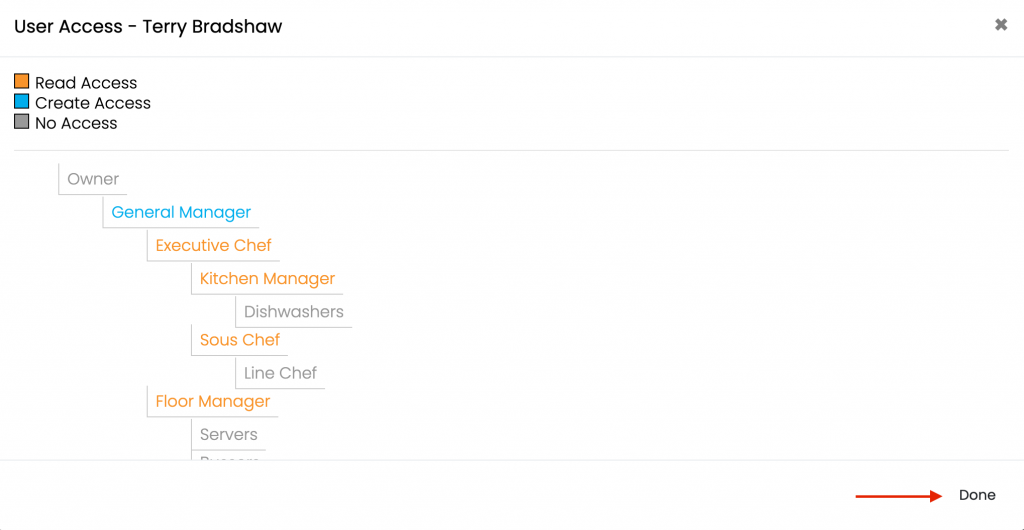
Giving access allows them to interact with positions on the Organization Chart and the processes linked to that position. Any process that the user needs access to must be linked to their position by an Administrator.

-
Once access to positions has been created, establish what kind of access you would like the user to have to those positions.

Two types of Access:
Read Access: Allows the user to read and print the content they have access to.
Note: Read access is recommended for users who only view work processes. These users cannot edit processes but are encouraged to look for innovations and recommend them to their manager for implementation.
Create Access: Allows the user to utilize all TouchStone functionality except:
- Adding new processes to the Four Functions list.
- Adding new Sub-Functions to the Four Functions list.
- Re-ordering processes on the Four Functions List.
- Deleting processes from the Four Functions List.
- Moving positions on the Organizational Chart, under positions that they do not have access to.
Note: Create access is recommended for users who are in managerial positions and are entrusted to build and innovate all the positions and work processes for their department. The ability to create and modify the Four Function list is only available to Administrators.
-
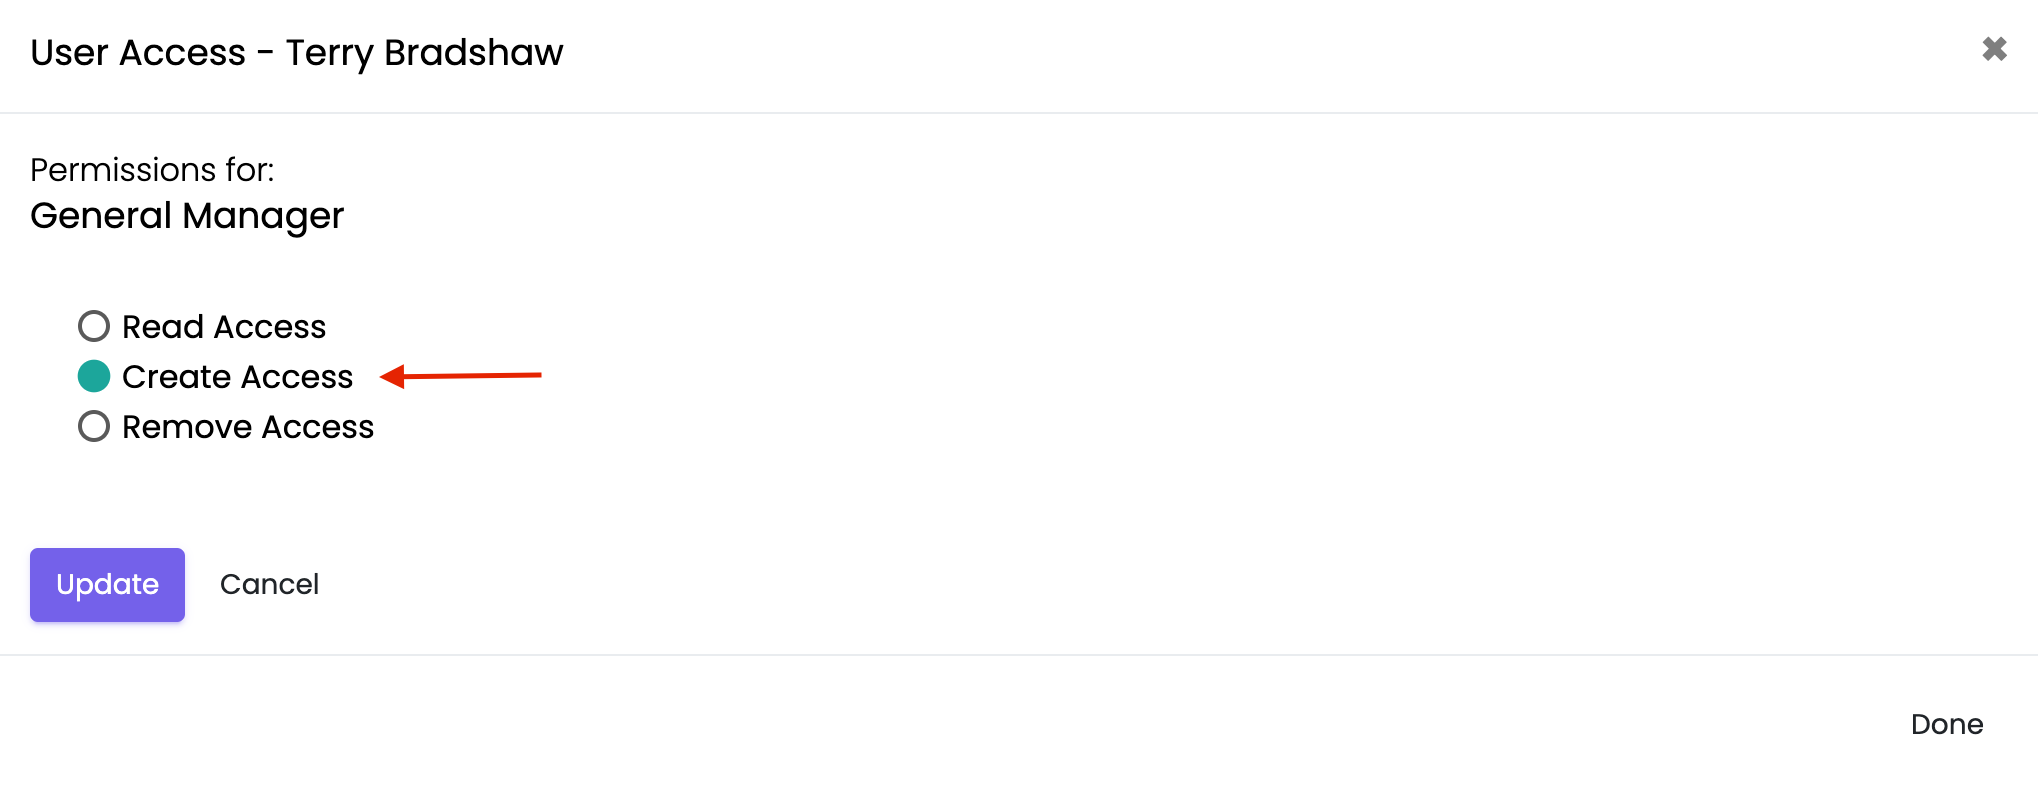
To set user access, select the position the user will have access to.

-
Choose the type of access the user will have.
-
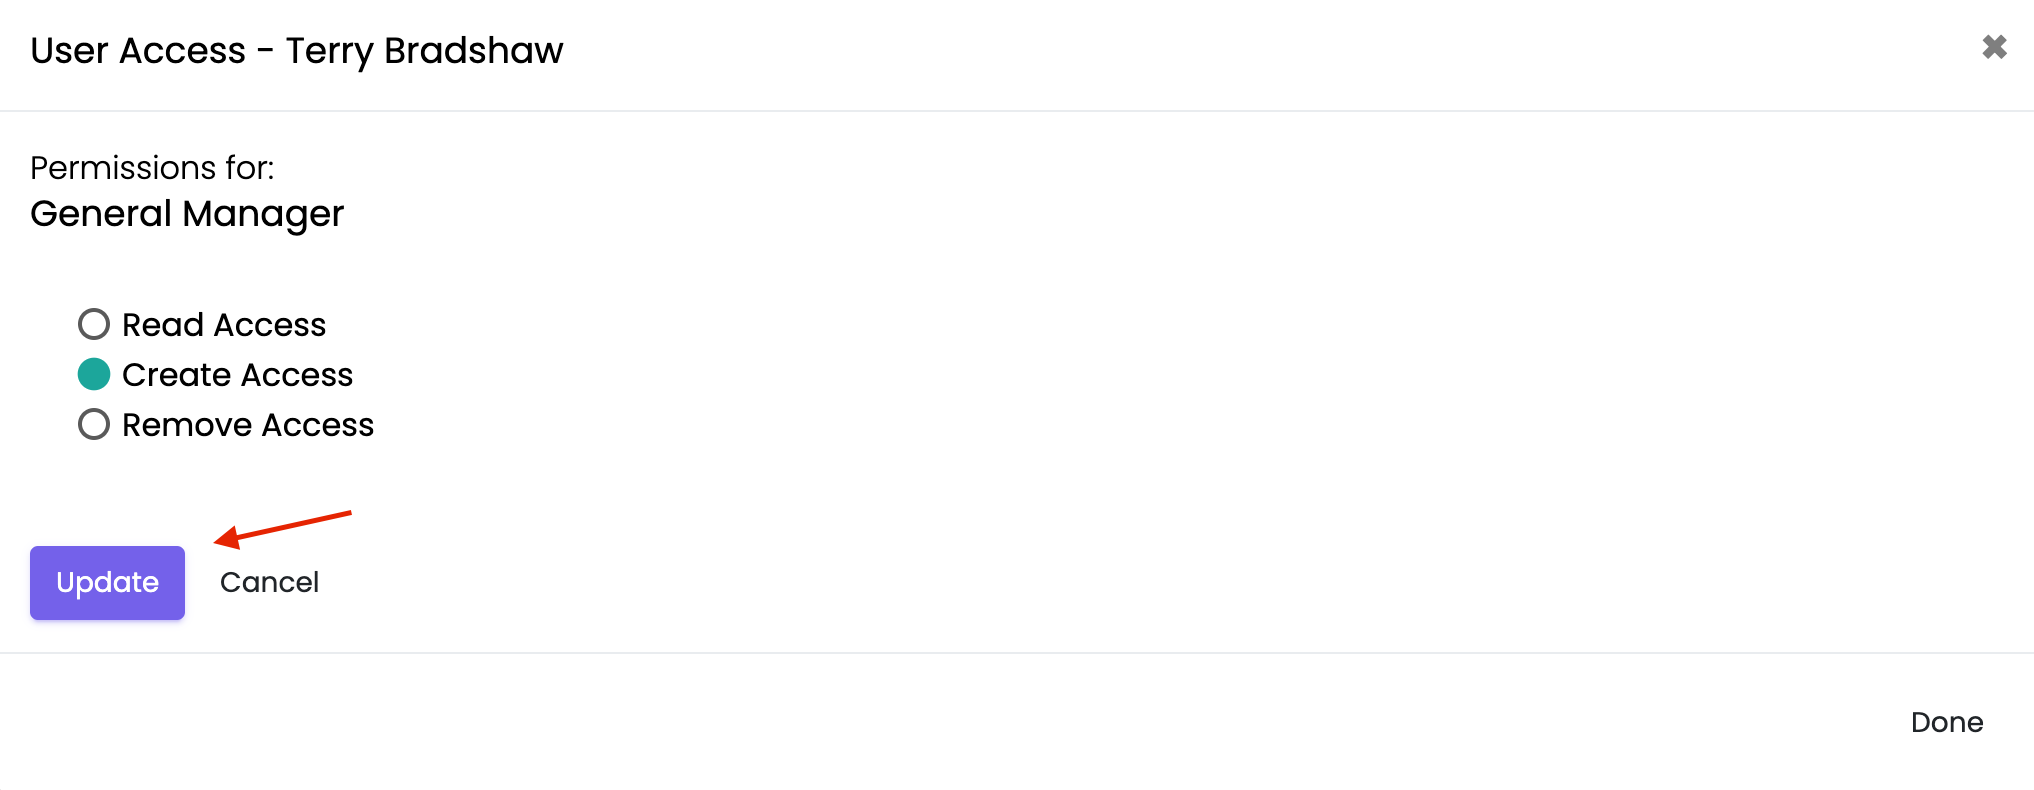
Click the “Update” button.
Note: The access level selected will then be shown under “User Access” designated with the color of the access given.
-
After choosing the type of access the user will have, click “Done.”
Note: When giving a user access to a position, the user will automatically be given the same access level to all the subordinate positions (all the positions on the Organizational Chart that are directly below that position). Access to the subordinate positions can be changed by selecting those positions under “User Access” and then changing the access level.


Continue below for additional resources:
- What is Account Administration
- User Accounts
- User List
- Creating New Users
- Deleting a User
- Profile
- Creating Position Access in Account Administration
- Account Settings
- http://help.touchstonebusinesssystems.com/user-guides/updating-contact-information/Updating Business Settings
- Changing Header Color and Text Color
- Uploading Your Logo
- Header Display